Warning
The CRC will officially retire AFS in May, 2027.
Rclone

Table of Contents |
|---|
What is Rclone?
Rclone, sometimes known as rsync for the cloud, is a tool written in Go which is used to transfer data to or from a computer and a cloud hosted data storage center. Rclone can connect to several different cloud storage centers such as: Amazon Cloud Drive, Amazon S3, Backblaze B2, Dropbox, Google Cloud Storage, Google Drive, Openstack Swift, Microsoft Onedrive, and others. Rclone can be used on the CRC front ends to upload/download data from your Google Drive or other Cloud Hosted Data storage to your home, group or scratch directory.
Setup and Configuration
Rclone is installed as a module, however it requires a configuration step for each user before it can be used.
To get access to rclone, you first need to load the module.:
module load rclone
For an in-depth look into rlcone, view the manual page:
man rclone
Important
Rclone stores the configuration of remotes (cloud storage entities) by default within ~/.config/rclone. If you remove your ~/.config directory you will need to reconfigure any remotes you had previously.
Prior to use, Rclone must be configured to work with your preferred cloud storage. The CRC has tested usage with both Box and Google Drive. Others may work but their functionality has not been tested.
For the following instructions, Rclone will be configured to work with Google Drive. The other forms of cloud storage may vary slightly in terms of configuration, but the general process is still the same.
Configuration via FastX
Important
This configuration using FastX is ONE TIME ONLY. You only need to authenticate between rclone and your account once.
All subsequent rclone modifications can be carried out as normal, connecting to the CRC and loading the rclone module.
bastion.crc.nd.edu (no VPN required, but must use ND Okta MFA)
rclone using the following command.module load rclone
Step 3: To start the configuration of Rclone, type:
rclone config
N into the prompt to create a new ‘remote’. In Rclone, a remote is the term for remote storage, so in this case, the remote will be a Google Drive object.$ rclone config
No remotes found - make a new one
n) New remote
s) Set configuration password
q) Quit config
n/s/q>
N and hitting enter, the prompt will ask you for a Name. A good name to enter is gdrv to easily remember that this is your Google Drive, however you can choose any name you like. Once you entered the name and pressed Enter, the prompt will then ask which type of cloud storage remote is being created. Each type has an “alias”, so to select Google Drive type drive or 20 and press enter.Note
Storage type numbers are subject to change from update to update as new storage options can be added as well has removed from the available list.
name> gdrv
Option Storage.
Type of storage to configure.
    Choose a number from below, or type in your own value.
     1 / 1Fichier
       \ (fichier)
     2 / Akamai NetStorage
       \ (netstorage)
     3 / Alias for an existing remote
       \ (alias)
     4 / Amazon S3 Compliant Storage Providers including AWS, Alibaba, ArvanCloud, Ceph, ChinaMobile, Cloudflare, DigitalOcean, Dreamhost, GCS, HuaweiOBS, IBMCOS, IDrive, IONOS, LyveCloud, Leviia, Liara, Linode, Magalu, Minio, Netease, Outscale, Petabox, RackCorp, Rclone, Scaleway, SeaweedFS, Selectel, StackPath, Storj, Synology, TencentCOS, Wasabi, Qiniu and others
       \ (s3)
     5 / Backblaze B2
       \ (b2)
     6 / Better checksums for other remotes
       \ (hasher)
     7 / Box
       \ (box)
     8 / Cache a remote
       \ (cache)
     9 / Citrix Sharefile
       \ (sharefile)
     10 / Cloudinary
       \ (cloudinary)
     11 / Combine several remotes into one
       \ (combine)
     12 / Compress a remote
       \ (compress)
     13 / Dropbox
       \ (dropbox)
     14 / Encrypt/Decrypt a remote
       \ (crypt)
     15 / Enterprise File Fabric
       \ (filefabric)
     16 / FTP
       \ (ftp)
     17 / Files.com
       \ (filescom)
     18 / Gofile
       \ (gofile)
     19 / Google Cloud Storage (this is not Google Drive)
       \ (google cloud storage)
     20 / Google Drive
       \ (drive)
     ...
Enter for each without typing anything into the field.Note
If you leave the Google Application Client ID blank, you may be rate limited with large downloads and uploads. If you are concerned about performance with a large amount of files or larger files, you may consider setting up your own Google Application Client ID. To do so, see https://rclone.org/drive/#making-your-own-client-id.
1.Scope that rclone should use when requesting access from drive.
Choose a number from below, or type in your own value.
Press Enter to leave empty.
1 / Full access all files, excluding Application Data Folder.
\ (drive)
2 / Read-only access to file metadata and file contents.
\ (drive.readonly)
/ Access to files created by rclone only.
3 | These are visible in the drive website.
| File authorization is revoked when the user deauthorizes the app.
\ (drive.file)
/ Allows read and write access to the Application Data folder.
4 | This is not visible in the drive website.
\ (drive.appfolder)
/ Allows read-only access to file metadata but
5 | does not allow any access to read or download file content.
\ (drive.metadata.readonly)
Enter. Also leave the Service Account Credentials blank. Press Enter.N.Edit advanced config? (y/n)
y) Yes
n) No (default)
y/n> N
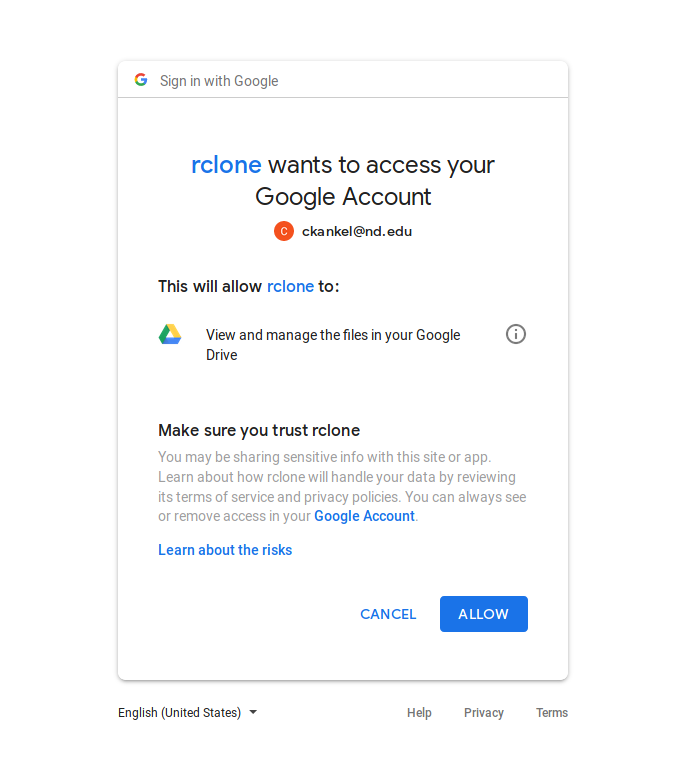
Y.Use web browser to automatically authenticate rclone with remote?
* Say Y if the machine running rclone has a web browser you can use
* Say N if running rclone on a (remote) machine without web browser access
If not sure try Y. If Y failed, try N.
y) Yes (default)
n) No
y/n>
N.Configure this as a Shared Drive (Team Drive)?
y) Yes
n) No (default)
y/n>
Y, and you can then press Q to exit the configuration. Rclone is now ready to use your Google Drive.Rclone Commands
There are a few commands that will be used frequently which will be described here. To see more commands, read the manual page by typing ‘man ./rclone.1’ while inside the Rclone directory.
Uploading Files from CRC to Google Drive
To upload files from the CRC to Google Drive, use the
copycommand in the following format, assuming your remote is called “gdrv”:
rclone copy file1.txt gdrv:file1.txt
This will place the file or directory specified into your Google Drive account.
If you wish to specify a directory for the files to be put into once inside Google Drive, type the directory desired after the name of your Google Drive Remote which was created during configuration.
rclone copy file.txt gdrv:Desired_Directory/file.txt
Accelerating Upload
The upload speed of a file or directory can be very, very slow. To overcome this, Rclone can take a few options or parameters to dramatically increase upload speed.
rclone --transfers=10 --checkers=10 --drive-chunk-size=16384k copy /foo/bar/source [Name of Remote]:Destination_Directory
–transfers indicates the number of parallel file transfer streams to occur at once. This number can be oversubscribed without damaging results. To have optimal upload speeds, you must increase the size of your files and the number of transfers and checkers.
If you have 64 files to upload, set –transfers=32
–checkers indicates the number of parallel file checkers. These checkers check through all of the files to be uploaded, and comparing it against what is already in your Google Drive. This way, if you have a few of the same files, they will not be uploaded.
–drive–chunk-size drive chunk size specifies how much memory (RAM) will be used for the files during upload. It is noted in rclone documentation that the higher the drive chunk size, the faster the upload. However, this will quickly increase memory usage during the upload so caution should be used. A good amount to specify is 16384k, which is 16 MB. The default is 8MB, so this will nearly double the performance with just this optimization.
See the examples below for more information.
Downloading Files from Google Drive
Downloading data from Google Drive (or any other cloud service) is the same process as uploading, but switching the destination and the source. So, to download data use the following command:
rclone copy [Name of Remote]:Source_Directory foo/bar/Local_Destination_Directory
It is not absolutely necessary to add flags to increase performance unlike uploading. There is not a significant improvement from the default download speed.
Other Useful Rclone Commands
It may be useful to view the contents of your Google Drive before uploading or downloading files. To do so without having to use a browser, use the following commands:
rclone lsd [Name of Remote]:(Optional Directory Name)
This will show the directory listing for your Google Drive’s ‘home’ directory. To view a specific directory listing you can append the directory name after the colon ( [Name of Remote]:Directory )
Notice the colon after the Remote, this is necessary for the proper execution of the command, whether or not you are specifying a specific directory.
This is helpful to quickly see the names of your directories before using the next command.
rclone ls [Name of Remote]:(Optional Directory)
This command will show you the entire listing recursively of the Google Drive.
Note
This may take a while to complete, as it will search every directory and list every file in your Google Drive. It may be faster to first find the directory names using rclone lsd, and then using the directory name to view the contents.
rclone ls [Name of Remote]:My_Uploads -- This will show all contents of the My_Uploads directory and sub-directories.
rclone [command] --dry-run [Name of Remote]:
This flag will allow you to test the command without having any consequences if there is a mistake. It is a good testing tool to view what would happen, without it actually happening.
Examples
The following are examples of using some of the Rclone commands:
An example of Downloading files from Google Drive to the CRC:
[12:29 @crcfe01 ~/upload_testing]
$ rclone copy gdrv:Upload_testing . --verbose
2018/08/07 12:29:21 INFO  : Local file system at /users/netid/upload_testing: Waiting for checks to finish
2018/08/07 12:29:21 INFO  : Local file system at /users/netid/upload_testing: Waiting for transfers to finish
2018/08/07 12:30:17 INFO  :
Transferred:   3.527 GBytes (57.723 MBytes/s)
Errors:                 0
Checks:                 0
Transferred:            0
Elapsed time:      1m2.5s
Transferring:

test.img: 84% /3.000G, 48.737M/s, 9s
debian.img: 100% /1.000G, 3.790M/s, 0s
An example of Uploading files from the CRC to Google Drive, using the optimized approach:
[12:37 @crcfe01 ~/upload_testing]
$ rclone --transfers=5 --checkers=5 --drive-chunk-size=16384k --verbose copy ~/upload_testing/ gdrv:Upload_testing
2018/08/07 12:39:30 INFO  : Google drive root 'Upload_testing': Waiting for checks to finish
2018/08/07 12:39:30 INFO  : Google drive root 'Upload_testing': Waiting for transfers to finish
2018/08/07 12:40:07 INFO  : debian.img: Copied (new)
2018/08/07 12:40:30 INFO  :
Transferred:   1.750 GBytes (29.694 MBytes/s)
Errors:                 0
Checks:                 0
Transferred:            1
Elapsed time:      1m0.3s
Transferring:


test.img: 24% /3.000G, 7.519M/s, 5m6s
[ output clipped ]
An example of viewing the contents of a directory within Google Drive while on a Front end machine:
[12:42 @crcfe01 ~/upload_testing]
$ rclone ls gdrv:Upload_testing
1073741856 debian.img
3221225505 test.img